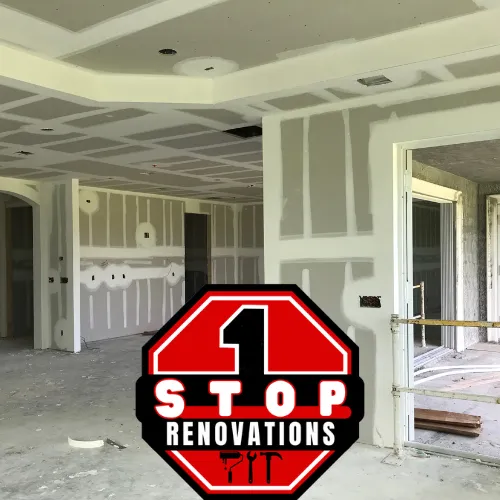
Step-by-Step Guide to Flawless Drywall Installation
Ladies and gentlemen, give it up for yourself for being here tonight! You could be anywhere—watching Netflix, eating snacks, scrolling TikTok—but instead, you’re here, ready to talk about drywall installation. Yes, drywall. The unsung hero of your home. The wall behind your walls. The real MVP that holds your family photos, your kids’ crayon masterpieces, and maybe even your late-night “don’t lean too hard” secrets.
Let’s dive into this step-by-step guide to flawless drywall installation—or as I like to call it, “How to turn a house into a home without crying in the corner.” Because, let’s be real, hanging drywall is no joke. It’s like trying to wrestle a giant graham cracker onto your wall.
Step 1: Get the Supplies
First things first, folks, you’ve gotta suit up. And no, I don’t mean a tuxedo. Unless you’re planning to host a drywall installation gala, then by all means, go full James Bond. But for us regular folks, you’ll need drywall sheets, screws, a utility knife, and, of course, that “I can totally do this” attitude.
And here’s where you start Googling things like “sheetrock installation near me” and wondering why there are 47 types of drywall. There’s moisture-resistant, fire-resistant, soundproof—basically, if drywall could talk, it’d say, “I’m the Swiss Army knife of home improvement.” Oh, and don’t forget to price it out. The drywall installation price per square foot will determine if you’re eating ramen this week or steak.
Step 2: Measure Twice, Cut Once
Or, if you’re like me, measure once, cut three times, and make an emergency trip to Home Depot. This step is critical, folks. You need to know if you’re hanging drywall horizontal or vertical. Experts say horizontal is stronger, but vertical is easier. It’s like choosing between a salad and a burger. You know what’s good for you, but sometimes, you’re just lazy.
Mark your measurements carefully, cut the sheets to size, and pray to the DIY gods that it fits. If not, hey, you’re about to become best friends with your utility knife.
Step 3: Hanging Drywall for Beginners
Now comes the moment of truth. Hanging drywall on walls is basically like putting up a giant sticker, except this sticker weighs 50 pounds and will crush your soul if you drop it. Pro tip: Always use a buddy. If you don’t have a buddy, hire one. If you can’t hire one, bribe your cousin with pizza.
Start from the ceiling and work your way down. Oh yes, drywall installation ceiling is the uppercut of the home improvement world. It’ll leave you sweaty, tired, and questioning every decision you’ve ever made. Use drywall hanging screws—not nails, people! Screws are like the loyal golden retriever of fasteners. They’ll stay put and won’t betray you.
Step 4: Drywall Finishing How To
Alright, you’ve hung the drywall. Now you’re staring at those seams like they just insulted your mama. This is where the magic happens drywall finishing jobs. You’ll need joint compound (a.k.a. mud), tape, and patience. Lots and lots of patience.
First, slap on the mud like you’re frosting a cake. Apply the tape, smooth it out, and repeat. And for those wondering, What are drywall finishing levels?” Let me break it down: Level 0 is “I just hung it” and Level 5 is “This wall is smoother than a baby’s bottom.” Aim for Level 4 unless you’re planning to host an art gallery in your living room.
Step 5: Outside Corners
Ah, drywall finishing outside corners. The part where you realize corners are evil. You’ll need corner bead for that crisp, clean edge. Secure it, mud it, and sand it until it’s smooth enough to make your reflection jealous. Seriously, outside corners are the divas of drywall. Treat them with care.
Step 6: Sanding and Priming
Grab your sander and get ready to create a dust storm that will rival the Sahara. Wear a mask—not just because it’s 2025, but because drywall dust will make you look like a ghost. Sand until everything is smooth, prime the walls, and boom—you’ve got yourself a masterpiece. Well, almost.
Step 7: Call the Pros if Needed
Now, if all of this sounds overwhelming, there’s no shame in calling drywall repair contractors. They’re the superheroes who swoop in when your DIY dreams turn into nightmares. Plus, they know the drywall installation cost per sheet like the back of their hand.
Bonus Tips for Hanging Drywall in the Basement
If you’re tackling a drywall installation basement project, here’s a quick tip: Moisture-resistant drywall is your best friend. Basements are like that one cousin who always spills something at family gatherings—they’re prone to dampness. Do it right the first time, and you won’t have to redo it later.
Drywall Installation Price and Costs
Let’s talk numbers because we’re all curious about the drywall installation price. It varies based on location, materials, and project size. On average, you’re looking at $1.50 to $3 per square foot. For the math nerds, that’s about $50 per sheet. Want it done professionally? Budget for labor, too.
Final Thoughts
So there you have it—a step-by-step guide to drywall installation with a dash of humor, a sprinkle of frustration, and a whole lot of elbow grease. Whether you’re searching for drywall installation Home Depot” or tackling hanging drywall for beginners,” remember: you’re one sheet away from greatness.
And if you ever get stuck, call the pros. Whether it’s a small repair or a full remodel, we’ve got you covered. Now go forth, hang some drywall, and make those walls proud!
